Social Media

Showing posts with label barry m. Show all posts

Sunday, 26 July 2015

Disney's Inside Out nails

I've been excited for the release of Disney's Inside Out since I first saw the trailer, so after I booked my tickets to go and it I decided to paint my nails to match. Here are my Inside Out nails featuring Disgust, Fear and Anger!


The movie was good, very emotional and I'm not afraid to say that I shed a tear towards the end!


The base of Disgust, Fear and Anger are gradient nails. To create Disgust I used China Glaze - 'Treble Maker' and 'Be More Pacific'. For Fear I used Barry M - 'Purple' and Essie - Lilacism. For Anger I used China Glaze - 'With Love', and finally the base for the logo is Barry M - Blue.


Tuesday, 21 July 2015

Inspired by a makeup look

So last night I was browsing Instagram and I saw this incredible makeup look that Lucisferismydad did. As soon as I saw it I knew I wanted to do some nail art based on it, so here they are! 


The black line on the top is meant to be the eyeliner and the pink on the bottom is the pink waterline. 


The polishes that I used were 'Pink Voltage', 'Liquid Leather', 'Fairy Dust' and 'Treble Maker' by China Glaze, 'Haute in the Heat' and 'Ruffles and Feathers' by Essie, 'Bright Purple' and 'Cobalt Blue' by Barry M.


To do the design I put a blob of polish on a peice of paper and used the sponge effect, with torn up bits of sponge and my tweezers.


Don't forget to follow me on Facebook, Instagram and Bloglovin', links are above!

Friday, 3 July 2015

Wimbledon Nail Art

So as Wimbledon started this week I thought it would be a good idea to break out my nail kit and get back into it. I love watching tennis and whenever tennis season starts I am always glued to my TV.


As usual I started with a base of OPI - Nail Envy, followed my two thin coats of OPI - Alpine Snow on my index, ring, and pinky finger. I used Barry M - Spring Green for my middle finger. I then painted on the designs with acrylic paint and a thin art brush.

I couldn't fit the entire logo on my nails as it's very tiny and too intricate for me to do (even with my tiny brushes!) so I abbreviated 'The Championships' to TC, and didn't fill in the racquets. 


Don't forget to follow me on Facebook, Instagram and Bloglovin', links are above.


Friday, 21 November 2014

Bob's Burgers Nail Art

My absence from updating this blog can be explained by two things, deadlines at uni and Netflix. I've currently been watching Bob's Burgers with my housemate, and I love it so much, it's such a funny show and I recommend it to everyone.


I decided to paint my favourite characters from the show onto my nails, and let me tell you, this was very hard. I think next time I have a bit of an absence from nail art I'll ease myself into it more gently!


As usual I started out with a base of OPI - Nail Envy. I followed this up by two thin coats of OPI - Alpine Snow and then one coat of Barry M - Yellow. I put the white down first to make the yellow more vibrant and stand out more, as it is not the most pigmented polish out there. I then painted the art on with acrylic paint and finally topped it all off with Seche Vite.


I struggled quote a lot with this design, probably because there are many thin lines in the characters faces, such as their eyebrows, mouths and chins. The brushes I used were a little bit too thick to create such thin lines.


Tuesday, 26 August 2014

Reading Festival

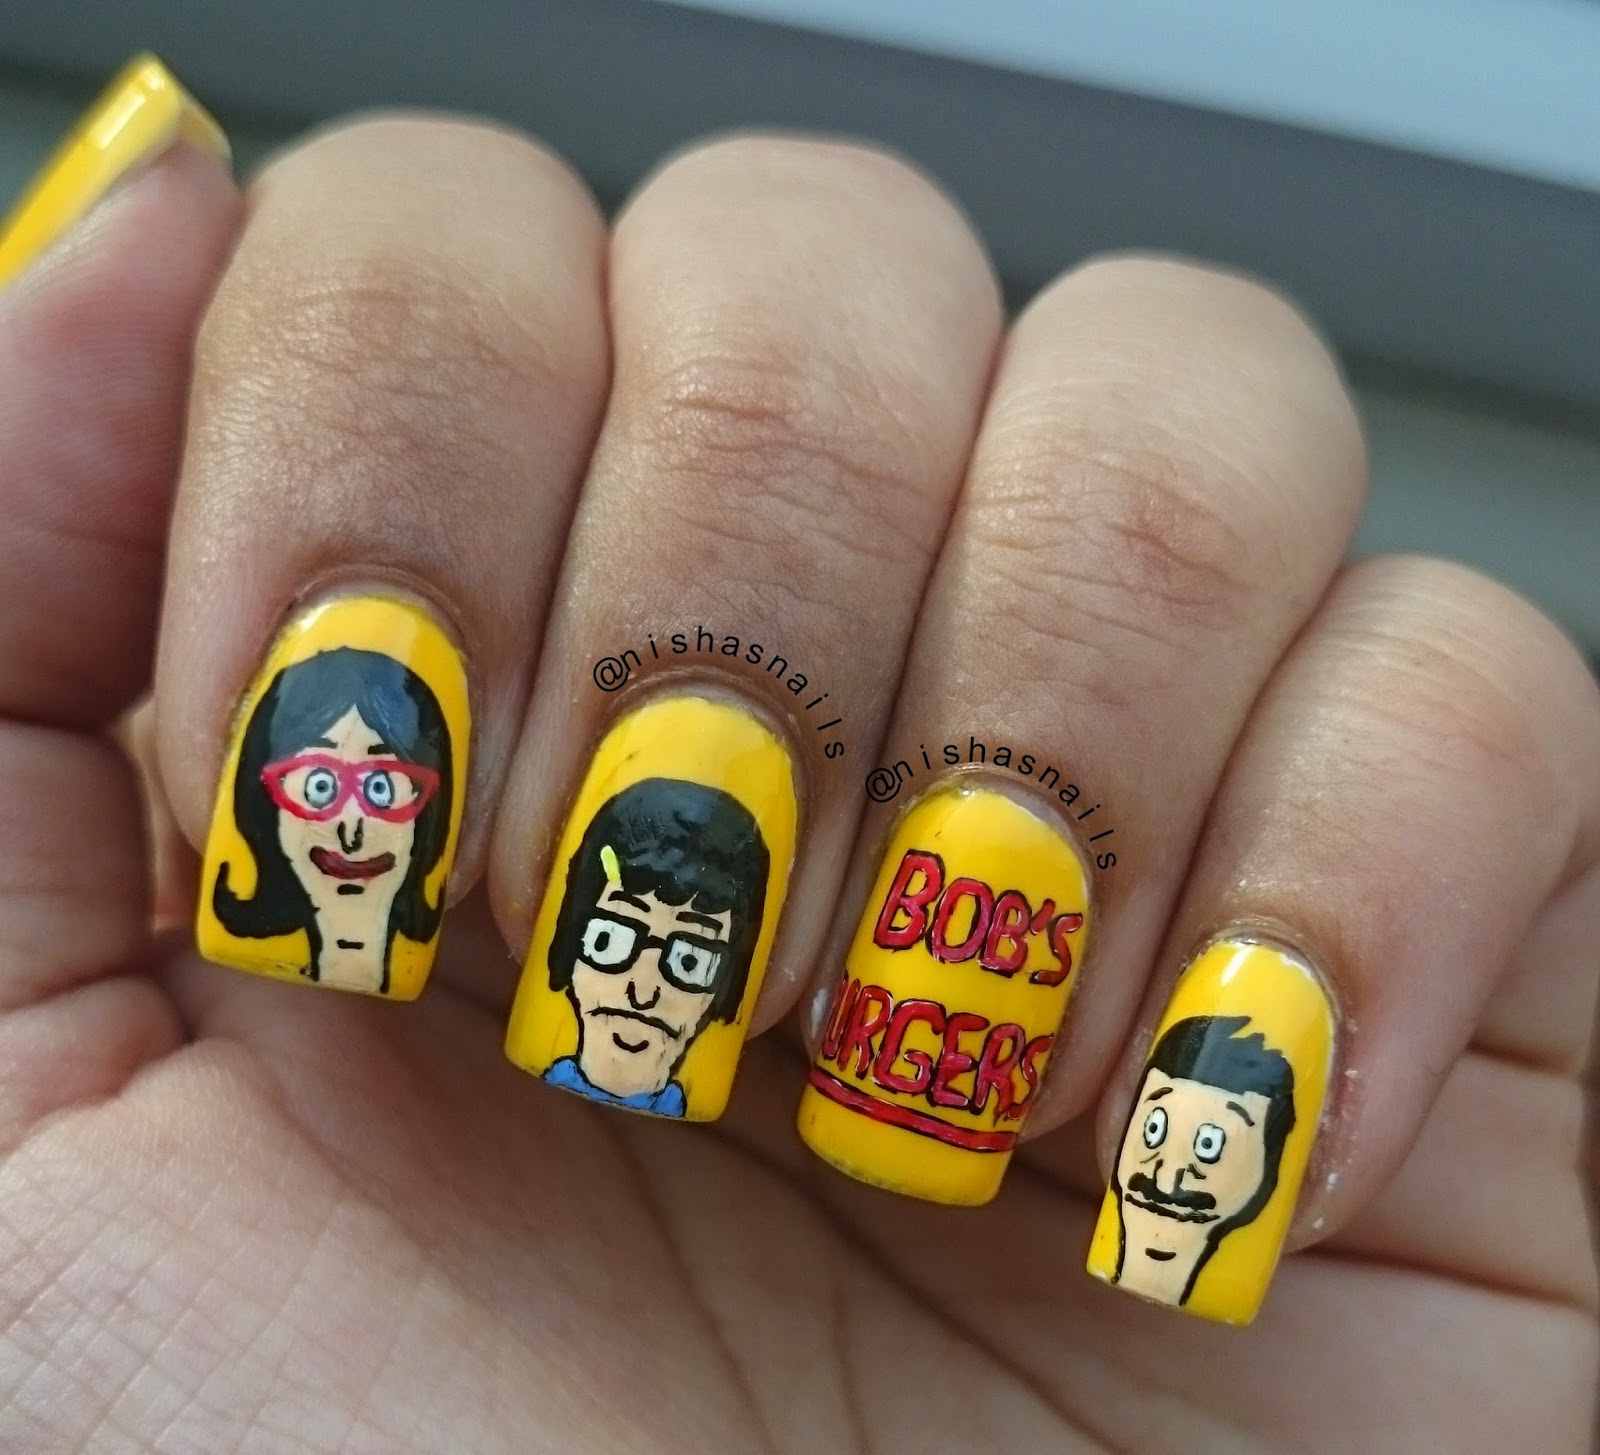
Unfortunately this year I wasn't able to go to Reading Festival, so instead I decided to paint it onto my nails! 


I had a lot of fun doing this design as it was something different to everything else that I've done before. I originally was going to have some chairs around the campfire but it proved to be too difficult to paint onto such a small surface. Even so, I'm really happy with how this turned out!


As usual, I used OPI -Nail Envy as my base coat and Seche Vite as my topcoat. On my index and pinky finger I painted two thin coats of China Glaze - With Love. On my middle finger I painted the tip with China Glaze - Brownstone and the rest with Collection 2000 - . Finally on my ring finger I first painted two thin coats of OPI - Alpine Snow followed by two thin coats on Barry M - Bright Yellow.


To those who ask what brushes I use, it's normally these two that i tend to reach for. They are Cheeky Nail Art Brushes that I bought in a pack of 15 that I had trimmed down so that they are the size and thinness that I want.
All of the detailing is done with slightly watered down acrylic paint and these brushes.


Make sure to follow me on Bloglovin as well! www.bloglovin.com/nishasnails

Saturday, 16 August 2014

Aladdin Nail Art

After I heard about the passing of Robin Williams I decided to do Aladdin nail art. Aladdin is one of my favourite Disney movies and my favourite character that Robin Williams portrayed during his career.

For this design I decided to have a sunset in the background, the palace on one nail, and Aladdin, Genie and the magic lamp on the others.


To create the base I first painted two thin coats of OPI - Alpine Snow onto my nails. This helps when sponging on lighter colours as it makes the colours appear more vibrant. I then sponged on Barry M - Yellow, Barry M - Block Orange, and China Glaze - With Love onto my nails. This created the sunset in the background.


Finally I painted the designs on using acrylic paint and my cheeky nail art brushes. Overall I'm happy with how these turned out, although if I'm honest with you I did give up a bit towards the end so Aladdin and the lamp aren't exactly how I planned for them to turn out.


Friday, 25 July 2014

Green Spring nails with yellow flowers

As Spring turned into Summer I realised I hadn't done many Spring nail designs, so I came up with this. The base is a gradient using China Glaze - Be More Pacific, Barry M - Spring Green and Barry M - Racing Green. I topped that off with a coat of Seche Vite (my all time favourite top coat) and then painted on the blades of grass and the flowers with a thin striping brush, a small dotting tool and acrylic paint.

Overall I'm really happy with how these turned out, green is one of my favourite colours but I always have such difficulty trying to incorporate it into my designs.