Social Media

Showing posts with label opi nail polish. Show all posts

Monday, 5 September 2016

I'm Back


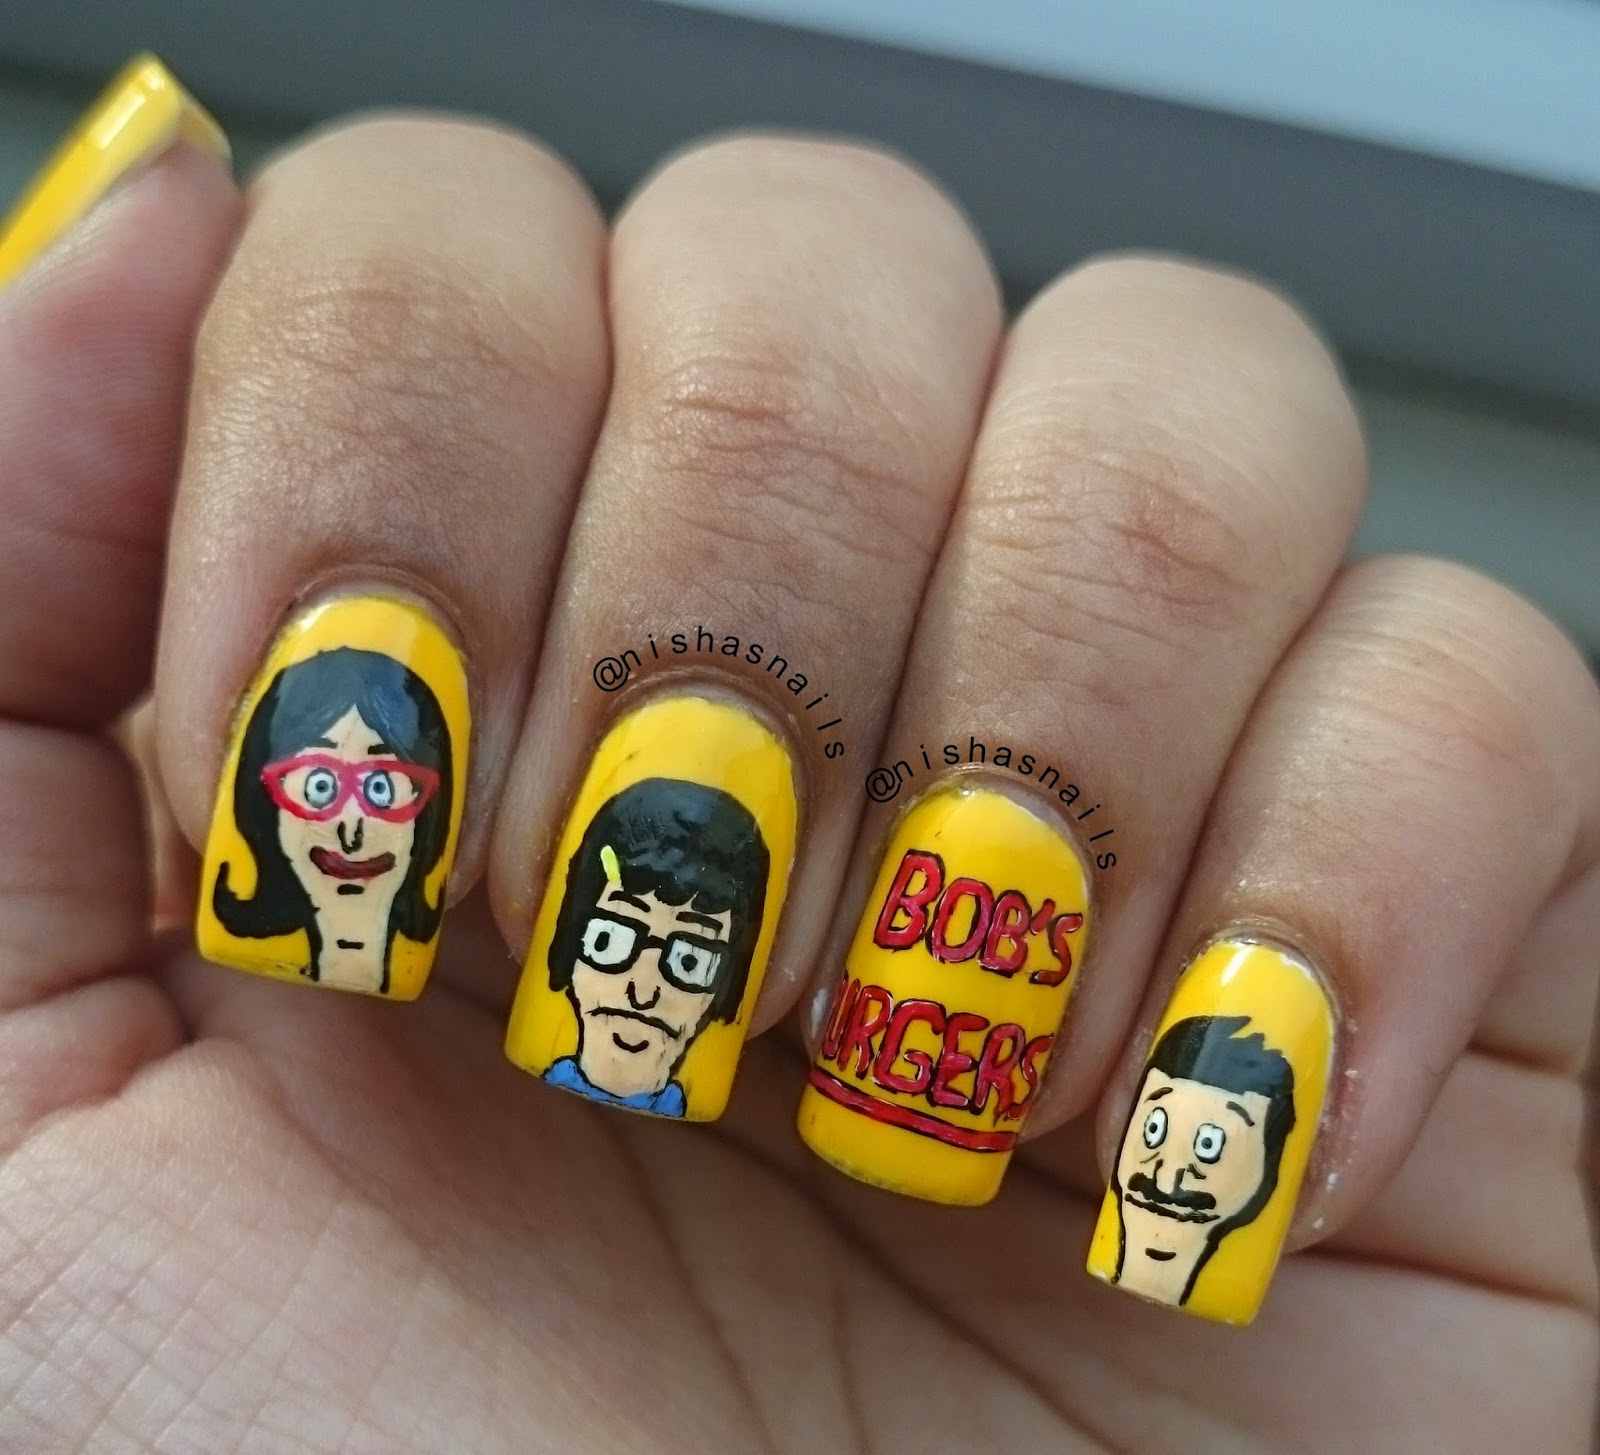
Hi Everyone! I'm finally back after a 13 month break! For those of you wondering, I was away as I was working in a lab for a year, so was unable to paint my nails at all. Not even a clear nail strengthener. I was awful at first but then I got used to it. Now that's over and I'm back at uni for my final year, and I can start this up again! My nails aren't in the best condition, and I'm pretty out of practice with the art (as you can probably tell from the photo) so it'll take me a month or two to get back to how I was, but I'm really looking forward to starting this up again.

So yeah, thanks for sticking with me and hopefully you'll like what I'm going to be doing! 

Friday, 24 July 2015

Green Crosshatch

I've been doing some pretty complex designs lately so decided to take it down a few notches today and do something simple. I ended up doing this classic crosshatch design with diamontes. 


To create this design I first painted two thin coats of OPI - Alpine Snow  on my index and pinky fingers, and two thin coats of China Glaze - Treble Maker on my middle and ring fingers.


1. Start with two thin coats of your base colour.
2. Using a thin brush draw three diagonal lines on your nail with the other polish.
3. Draw three more diagonal lines in the opposite direction then seal with a top coat.
4. Start with two thin coats of your base colour.
5. Place the diamontes on your nail and then put a top coat over to seal them in.


Don't forget to follow me on Insagram, Facebook and Bloglovin', links are above.

Tuesday, 21 July 2015

Inspired by a makeup look

So last night I was browsing Instagram and I saw this incredible makeup look that Lucisferismydad did. As soon as I saw it I knew I wanted to do some nail art based on it, so here they are! 


The black line on the top is meant to be the eyeliner and the pink on the bottom is the pink waterline. 


The polishes that I used were 'Pink Voltage', 'Liquid Leather', 'Fairy Dust' and 'Treble Maker' by China Glaze, 'Haute in the Heat' and 'Ruffles and Feathers' by Essie, 'Bright Purple' and 'Cobalt Blue' by Barry M.


To do the design I put a blob of polish on a peice of paper and used the sponge effect, with torn up bits of sponge and my tweezers.


Don't forget to follow me on Facebook, Instagram and Bloglovin', links are above!

Sunday, 5 July 2015

Tarzan Nails

I was looking through my archive of nail design I've done and came across these ones that i did back in February but forgot to post them!

Here are my Disney's Tarzan nails. They're not my best but I did these the day before a deadline as procrastination so I wasn't really that fussed about getting them perfect!


 I started out with a base of OPI - Nail Envy then followed up with two thin coats of China Glaze - Be More Pacific. 

The index and pinky fingers are meant to be trees with vines hanging off them, but im not sure how well that translates!


Don't forget to follow me on Instagram, Facebook and Bloglovin', links are above!

Friday, 3 July 2015

Wimbledon Nail Art

So as Wimbledon started this week I thought it would be a good idea to break out my nail kit and get back into it. I love watching tennis and whenever tennis season starts I am always glued to my TV.


As usual I started with a base of OPI - Nail Envy, followed my two thin coats of OPI - Alpine Snow on my index, ring, and pinky finger. I used Barry M - Spring Green for my middle finger. I then painted on the designs with acrylic paint and a thin art brush.

I couldn't fit the entire logo on my nails as it's very tiny and too intricate for me to do (even with my tiny brushes!) so I abbreviated 'The Championships' to TC, and didn't fill in the racquets. 


Don't forget to follow me on Facebook, Instagram and Bloglovin', links are above.


Wednesday, 24 December 2014

Winter Forest

A quick update today as I'm going to watch Skyfall with my family in a bit! I've been so busy this holiday period, going on trips to London and spending time with my family. Since going to uni Christmas has turned into my favourite holiday as it's the only time that me and my two older sisters get to spend together. 

Yesterday I was browsing though Instagram trying to get inspiration for a Christmas design and I came across a great snowy forest scene that 'nailsbyjema' had done. I tried to do my best to recreate it but it didn't really turn out how I wanted it to!


The above picture is shown with a glossy top coat, the picture below is with a glitter topcoat to show snow falling, and the one below that is with the glitter and a matte topcoat. 


As usual I used OPI - Nail Envy as my base, then followed it up with two coats of OPI - Alpine Snow. The detailing was done with acrylic paint and a small detail nail art brush. 

I'm not too happy with these nails so I will probably paint them again tomorrow evening, I'll hopefully get some new nail polishes for Christmas that I can try out!


Don't forget to follow me on Facebook, Instagram and Bloglovin', links are above!

Thursday, 27 November 2014

Christmas Jumper Nails

With Christmas coming round the corner I thought it would be a perfect time to start on the Christmas nails! These are inspired by a t-shirt and some slippers that I saw at Primark the other when I went shopping. Fair Isle snowflakes are some of my favourite to draw and paint so I knew that I would have some of them in this design.
 

I had so much fun doing these nails, Christmas jumper nails are some of my favourite nails to do as they really get me into the festive mood! As usual, I started this mani off with a base coat of OPI's Nail Envy. I then painted my index, middle and pinky finger with two thin coats of China Glaze - With Love, and my ring finger with two thin coats of OPI - Alpine Snow.


With Love is my all time favourite red nail polish, it's the perfect consistency and is fully opaque in two thin coats which is perfect! If you're searching for red then I highly suggest you try this one out! 

Here's an image of the top and slippers that inspired this look. Unfortunately I was not able to take pictures of my nails against the items as I am currently visiting a friend.


Hope you're all having a great day and don't forget to check out my Facebook, Twitter and Bloglovin', links are above! 

Friday, 21 November 2014

Bob's Burgers Nail Art

My absence from updating this blog can be explained by two things, deadlines at uni and Netflix. I've currently been watching Bob's Burgers with my housemate, and I love it so much, it's such a funny show and I recommend it to everyone.


I decided to paint my favourite characters from the show onto my nails, and let me tell you, this was very hard. I think next time I have a bit of an absence from nail art I'll ease myself into it more gently!


As usual I started out with a base of OPI - Nail Envy. I followed this up by two thin coats of OPI - Alpine Snow and then one coat of Barry M - Yellow. I put the white down first to make the yellow more vibrant and stand out more, as it is not the most pigmented polish out there. I then painted the art on with acrylic paint and finally topped it all off with Seche Vite.


I struggled quote a lot with this design, probably because there are many thin lines in the characters faces, such as their eyebrows, mouths and chins. The brushes I used were a little bit too thick to create such thin lines.


Thursday, 2 October 2014

Harry Potter Nails

The Harry Potter franchise is something that will always be close to my heart and it's also something that I've tried to paint into my nails many times before, always failing. This time I was determined to make it look good and drew out the design on paper beforehand. I'm really pleased with how these turned out and I hope you guys like them too!


The concept is that it's Harry, Ron and Hermione getting sorted into Gryffindor. The Sorting Hat was so hard to paint, making sure that it was in a slightly different position each time, still making sure the shading made it distinguishable as the Sorting Hat.


I started off with a base of OPI - Nail Envy. Then on my index, middle and pinky fingers I painted on two coats of OPI - Alpine Snow, and on my ring finger I did two coats of China Glaze - With Love. 


As usual, don't forget to follow me on Facebook, Instagram and Bloglovin' for more nail art, links are above!

Thursday, 18 September 2014

Where's Wally Nail Art

So the other night I headed out for a Where's Wally vs Smurf's party. I decided to go as Wally so naturally I painted him onto my nails.


As usual I started out with one coat of OPI - Nail Envy, followed by three thin coats of OPI - Alpine Snow. I didn't have any striping tape so I had to use my striping brush to create the red stripes, I'm pretty pleased with how straight they are but I have to remember to invest in some tape for future manis!


To paint Waldo onto my nails I used acrylic paint and my Cheeky Nail Art Brushes.


Don't forget to follow me on Facebook, Instagram and Bloglovin, links are above.